DIY Map Phone Case

10270912_10152464825304673_840640622_oMaterials:

  • plastic phone case
  • mod podge
  • map
  • glitter
  • brush
  • scissors

Directions:

  • Trace the edge of your case on the back of the map and cut it out
  • Use a slightly damp cloth to wash any dust particles off the phone case and then paint the back of the phone case with the mod podge
  • Place the map on top of the mod podge and press it down so it dries flat
  • Give it time to dry and then paint over the edges of the phone so the map sticks. If you wish, this is when you can coat the edges with glitter for a little added bling
  • Allow everything to dry for 15-20 minutes between each coat of mod podge.

The Mermaid Voodoo Doll

Some friendships are weird. My friendship with my best friend Kate is especially weird. Over the summer she got a drastic haircut so she sent me a braided lock of her hair in an envelope full of glitter. Since she lives in New Orleans I thought the perfect response would be to use that hair on a voodoo doll. However I could only find a pattern for a felt mermaid in my mom’s craft books. So a mermaid voodoo doll it was.

P1000237

Step 1: Draw an outline of a mermaid onto a piece of paper and cut it out.

P1000238

Step 2: Pin the paper mermaid onto a piece of felt. Trace the outline. Repeat. Cut out both felt mermaid outlines.

P1000239

Step 3: Use embroidery thread to decorate each side of the mermaid and then pin the two pieces together. Stitch them up, stuffing the mermaid with cotton as you go.

P1000242

P1000243

Step 4: Stitch your voodoo mermaid’s hair on. If you want a more normal mermaid doll you can use yarn for this. Admire your glorious handiwork. Have a photoshoot. Mail it to your best friend.

photo

Denim Jacket to Vest

Turn that hand-me-down denim jacket that you rarely wear into a denim vest! I’m seeing them everywhere these days and I secretly adore them so I had to have one for myself. I’ve never particularly liked this denim jacket and the sleeves are so constricting so…problem solved!

P1000211P1000229

All you have to do is cut along the seam where your sleeves are attached to your jacket. Don’t worry about fringe or a jagged line – its supposed to look a little rugged.

P1000230

Now that you’ve got your super hip denim vest, go have a little fun…

vest

Honestly it started raining as we were taking this picture so I actually just ran back inside and put my pajamas on, but I will have fun in my vest soon!

Scrapbook Paper Elephants

Image
You’ll need:

-scissors

-pencil

-eraser

-tape

-baker’s twine

-a sheet of white paper

-fun scrapbook paper

Image
1. Sketch out the shape of the elephant you want. Don’t worry about making it perfect – it’s just an outline and every time you trace it and cut it out the shape will change a little anyway.

2. Cut the elephant out and use this as your stencil.

Image
3. Cut out your elephants and tape them to the baker’s twine

4. Hang them up wherever you please!

Image


The inspiration for the project came from: http://lovepeacepionies.blogspot.com/2011/03/jeg-blir-alltid-inspirert.html

Paper Rose Tutorial

Image


You’ll need:

-Scissors

-A Pencil

-Decorative paper squares

Image

1. Start by drawing a spiral on your paper

Image

2. Cut along the line you have drawn and make sure you get rid of the corners

Image

3. Start with the outer end of the spiral and roll it until you get to the circle in the middle which will be the base of your flower

Image


4. Your flower should sit comfortably on the circular base

Image

Owl Pillow Tutorial

P1000057

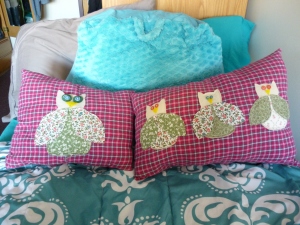
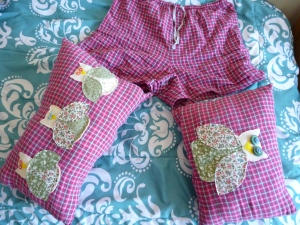
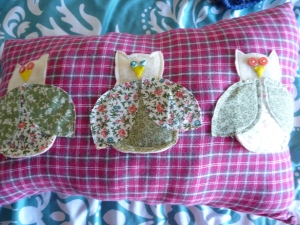
I made these owl throw pillows last summer with a pair of old flannel pajama pants that I turned into shorts.

1. Put on your pajama pants and use a fabric pencil to mark off where you want your shorts to end. Cut across your pants about an inch below this mark so you can hem them. The legs will become your pillows.
P1000101

2. Use a piece of white paper to draw the outline of an owl that will fit on your pillow. Also draw a proportionate outline of a wing, a belly, and a beak. These will be your stencils.
3. Cut out your stencils and pin them to the fabric you are using to create your owl. My pajamas were pink, green, and white so I used a few different fabrics with the same colors.
4. Trace around your stencils onto the fabric and then cut out each piece.
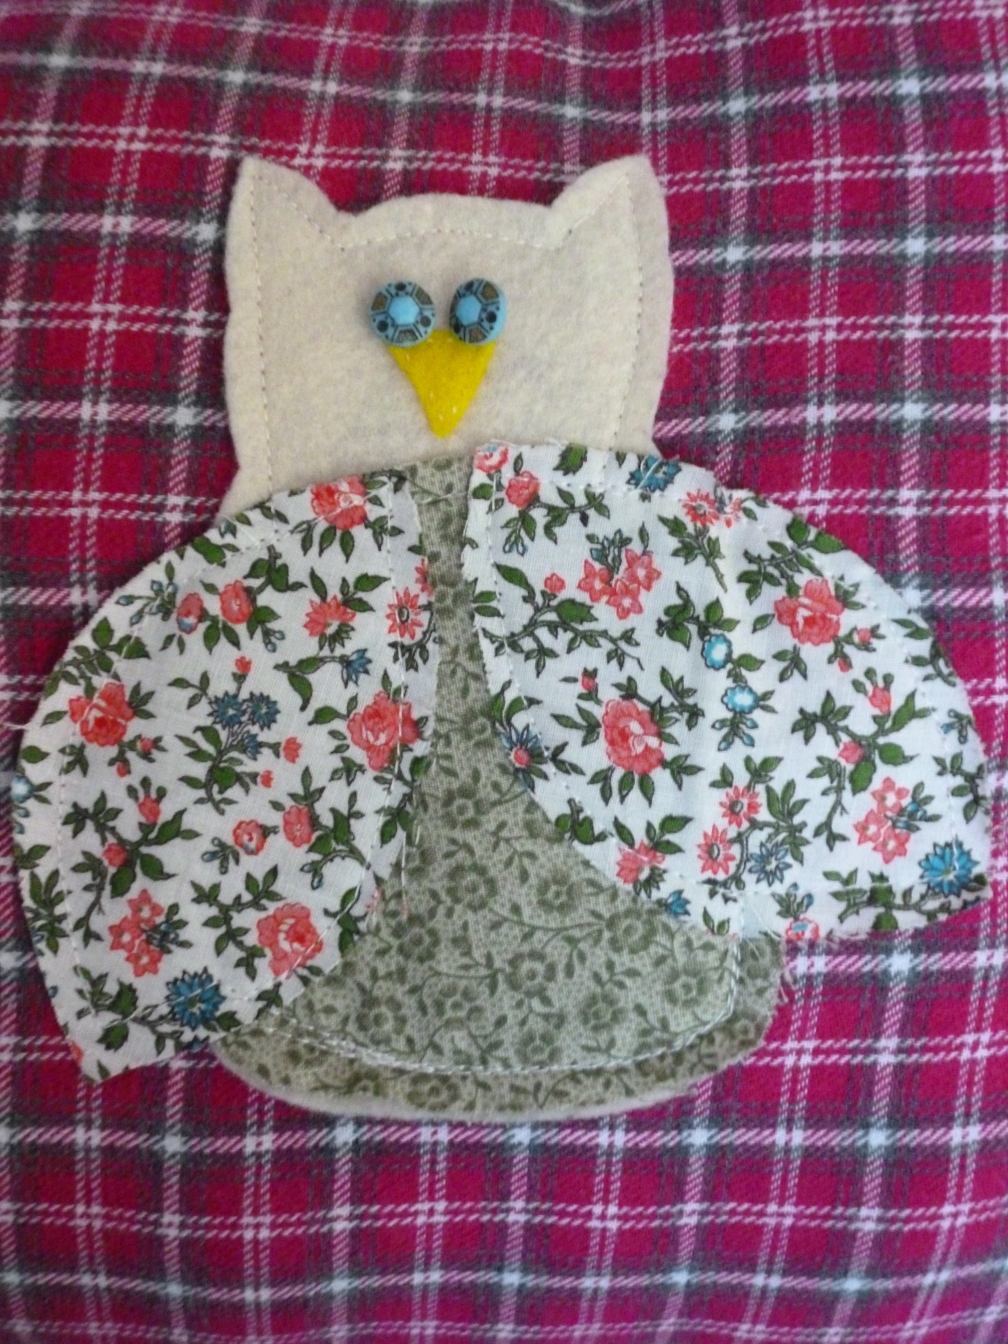
5. Pin the basic outline of the owl to your pillow. I used felt for this so it wouldn’t fray. You can hand-sew this or use a sewing machine.
P1000056

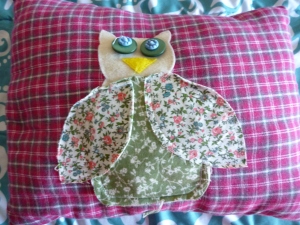
6. Next pin and sew on the belly, wings, and beak. Hand-sew fun buttons for eyes.
7. Turn the pillow inside-out and sew one side completely closed. Sew the other side about three quarts of the way across.
8. Turn the pillow right side-out again and poke the corners out with the eraser end of a pencil.
9. Stuff the pillow with polyfill stuffing which you can find by the bag in Michael’s, Walmart, or Target.
10. Make sure you don’t under-stuff the pillow! It will be flimsy and sad if you do. When your ready sew the hole closed and enjoy your handiwork!
P1000055

Valentine’s Day Paper Heart Chains

P1000086P1000085

Grab a stapler and strips of construction paper and you can do this in 5 minutes.
1. Hold the ends of two pieces of construction paper together and staple
2. Pull the other ends together and then hold the ends of two more strips on top and staple
3. Repeat step two until you have the length you want for you heart chain. When you’re done, staple the bottom.

Note: Make sure your construction paper is sturdy! Mine was a little flimsy which made the hearts stretch too much.

Here’s an even simpler paper heart chain:

P1000087 P1000089

Cut out construction paper hearts and circles of varying shapes. Tape them onto gift wrap ribbon in a pattern that makes you happy.